Using Maven archetype you can very easily create the gwt project in Maven. Follow below steps to create the same.
Assumption: You have latest version of maven installed (Tried the below steps with 3.0.3 version)
Following are the steps to import this Maven project inside Eclipse and setup eclipse WebProject for the same.


Assumption: You have latest version of maven installed (Tried the below steps with 3.0.3 version)
- mvn archetype:generate
- It will ask for archetype to use specify 258 (gwt-maven-plugin).
- Then it will ask for other details like any other archetype asks for, enter the required details. And it will create the given GWT project with the details you have entered with a sample application.
- Once the project is created open pom.xml and change gwt-servlet and gwt-user dependencies version to the version you want.
- try building the project and test the sample project.
Following are the steps to import this Maven project inside Eclipse and setup eclipse WebProject for the same.
- Install GWT eclipse plugin (http://dl.google.com/eclipse/plugin/3.6) for more details refer (http://code.google.com/webtoolkit/usingeclipse.html).
- Install required maven plugins refer (http://pandurang-patil.blogspot.com/2011/08/setup-eclipse-project-from-maven.html) just refer "Install maven eclipse plug-in" section.
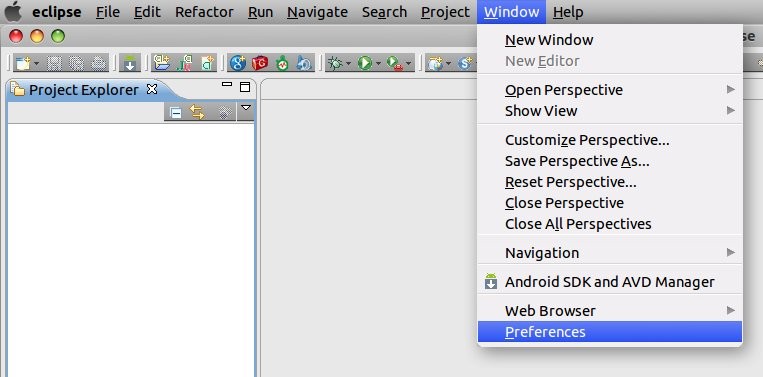
- Once you are done with installing all the required plugins. Click on "Window=>Preferences". Eclipse Preferences window will appear.

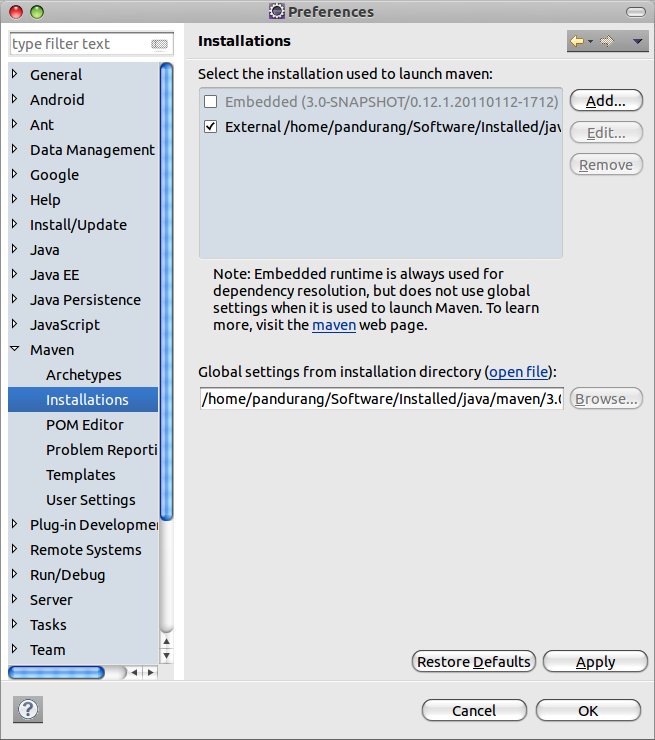
- Select "Maven" on the left hand side. You will see "Goals to run on import project" enter "process-resources" in that field same as that of immediate below field. And click on "OK".
- Once you are done with those changes import the Maven project into eclipse as per steps referred under section "To setup eclipse project for your maven project follow below steps" of Setup eclipse project from a Maven project. It might take some time to download some dependencies.
- Once you are done with importing the project inside eclipse. To run and debug imported GWT application inside eclipse you need to follow few more steps.
- Right click on imported project and select "Properties".

- On Properties window expand "Google" and select "Web Toolkit" and check "Use Google Web Toolkit" check box and select the GWT sdk version.

- Select "Java Build Path" and then select "Source" tab from right hand side panel. You need to remove excluded ** for <project>/src/main/resource and <project>/src/test/resource as "<module>.gwt.xml" files are created inside resource folder as per maven standard and while importing it in to Eclipse, it excludes the contents of resource folder for some reason.
- Now you are all set to run the application
- Right click on project and select "Run as"=>"Web Application" it will run the application with embedded tomcat.

- You will see application running on "Development Mode" panel right click on url select "Open With" and add browser.

- Select the browser executable with path. And it will open the application on given browser in dev mode.
- If you are running the GWT application first time on given browser it will ask you to install GWT Plugin. Install that plugin and hit the url once again.

- You will see above sample application opened in your selected browser.